Did you know that Google gives you a fireworks show when you get a perfect lighthouse score?! Try running a speed test on this page and you’ll get to see those fireworks for yourself. I’ve optimized this site you’re on right now to get a perfect score on most pages!
In this post, I’m going to show you exactly how you can achieve the elusive perfect Google lighthouse score.
Build your Website with WordPress, Gutenberg, and Tailwind CSS
Yep, you read that correctly. In order to get a perfect lighthouse score you’ll want to build your website using WordPress, the Gutenberg block editor, and Tailwind CSS. 🤯
Install WordPress and Gutenberg on a Server
Download the latest copy of WordPress and the lastest copy of the Gutenberg plugin and install it on your favorite server. 🤯 ( yes, install WordPress on a server, not static/headless/serverless, a good old fashioned server ).
Actually, most hosting companies/server providers will install WordPress for you, so you probably don’t even need to do that.
I Highly Recommend SpinupWP + Digital Ocean
I LOVE SpinupWP and I use it for hosting all of my personal and client sites. They offer affordable, secure, performance optimized WordPress hosting and in order to get a perfect Google lighthouse score, you need WordPress optimized hosting.
SpinupWP serves as a beautifully designed, easy-to-use, control panel (cpanel) you can connect with any cloud service provider. I connect it to Digital Ocean ( I used to use AWS lightsail and there is no comparison in performance, security, reliability, and affordability ).
Typically, I’ll use a $12/mo Premium AMD with NVMe SSD server. I’ve found that I can fit ~10 lightweight sites on one server without a decrease in performance, but typically I try to stick to ~5-6 sites per server.
Add Tailwind CSS to WordPress
I feel like this step in particular is what makes getting a perfect lighthouse score possible. The reason being that if you use Tailwind CSS as intended, and purge all the unused styles, the CSS footprint of your site should be miniscule.
There are a number of ways that you could build a WordPress site with Tailwind CSS, and although we are extremely biased, the fastest and easiest way is to use our WordPress Plugin and Theme.
The Draft Plugin and Theme are optimized for quickly building WordPress websites with Tailwind CSS. The plugin gives you the ability to purge unused styles sitewide and only load the styles being used on your site. We’ve got a bunch of tutorials to help get you started.
Convert Images to WebP
This step is one of the most critical steps in getting a perfect lighthouse score, and if you don’t have a million images on your site, it’s super easy.
WordPress recently started supporting WebP image formats. WebP images are quite a bit smaller than JPEGs and are supported by all the major browsers.
There are a number of ways to convert images to WebP but I love the tool suggested by WordPress called Squoosh. I’ve been using it to convert all my JPGs to WebP.
That’s it, seriously.
Add Meta Description Tags
Adding Meta Description tags to your website’s head is another important piece of the puzzle. Inevitably, when I run a lighthouse speed test, if I don’t get a perfect score it’s because I forgot to add meta description tags to the page or post in question. Check out the screenshot below, not adding a meta description is a 9 point deduction to my SEO performance:

What is a meta description? It’s super simple, and I think, super important for crafting an SEO optimized page. All it does is provide search engines ( such as Google ) with a brief summary of a web page. I generally try to make the description human readable or even conversational. For example, our home page meta description is “Build WordPress Websites Fast with Tailwind CSS” and the meta description on this blog post is “How to Get a Perfect Google Lighthouse Score.”
Adding a Meta Description to a Custom Coded Website
If you’re coding a site from scratch, just throw the meta description tag in the head of your document:
<head>
<meta name="description" content="Build WordPress Websites fast with Tailwind CSS.">
</head>
You’ll want a unique meta description tag on every page, so you’ll have to figure out how to do that. You’ll find a bunch of great ways to do this on Google, much better than I can offer. Here’s an example search, “laravel meta description” and a helpful article for adding meta tags in Laravel, “Dynamic SEO meta-tags in Laravel website.”
Adding a Meta Description to a WordPress Website
If you’re building a site with WordPress there are a number of ways you can add meta description tags to pages and posts. You could manually add it with some code, or my preferred method, use a plugin.
There are a number of great SEO plugins out there such as Yoast, SEOPress, Rank Math, and many many more. In my opinion, some of these SEO plugins are a little heavy handed and some even feel intrusive!
Here’s a great article from wpengine, How to Add Meta Tags in WordPress, about how to add meta description tags to your WordPress site with or without a plugin.
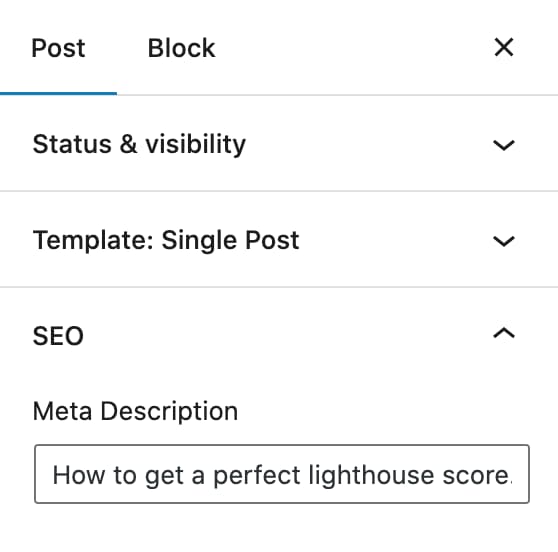
Adding a Meta Description Using the Draft Plugin
With all that being said, Draft has meta description functionality baked in, so if you have the Draft plugin installed, you don’t need to add a separate SEO plugin to get a perfect lighthouse score.
To add a meta description to posts and pages using the Draft plugin:
Go to the editor for the page or post > Go to Page/Post > SEO > Meta Description
Put Heading Tags in Sequentially-Descending Order
Google like’s semantically structured web pages and if your heading tags aren’t in sequentially-descending order, your page isn’t semantically structured! This isn’t just an arbitrary rule of thumb, it makes your page easier to understand and navigate for site users with or without assistive technologies.
So what would heading tags in sequentially-descending order look like? Use an h1 tag for your page title ( which you should always be doing this anyway for SEO purposes ), h2 tags for subtopics, h3 tags for sections under those subtopics, etc. Here is what the headings on this post look like:

It’s not hard to do, but it’s easy to forget. And don’t worry Google will remind you and give you a 98 instead of a 100 if you don’t do this step…

Use High Contrast Colors
Yes, that barely visible white smoke (#f7f7f7) looks so DOPE, but if a site visitor doesn’t have perfect eye sight, they won’t be able to see it anyway!
The Accessibility lighthouse score always seems to be yelling at me because of a lack of contrasting colors. The solution to this is simple, increase the contrast of your colors!
How do you do this? If your site has a white background, the closer your site’s text is to black, the higher it’s color contrast. Usually, I just keep tweaking the color until Google stops yelling at me. But, you could also use this great Contrast Checker tool by WebAIM or this much prettier Color Contrast Checker by coolors.
You may have to ditch some of those perfectly picked brand colors, but come on, it’s worth it for a perfect lighthouse score.
Give Links Descriptive Names
I probably resisted this one the most, just because I like Learn More buttons. I don’t want to have to think about a descriptive name for a link, I just want to be lazy and write “Learn More.”
Alas, I wanted to see those fireworks so I finally gave in and I must say, it does make for a better user experience. All you have to do is write some descriptive words about where the link is going to take you. For example, instead of writing “Learn More” for a link to an About page, write “About My Company” or instead of “Contact Us” write something like “Book a Free Consultation.”
On this page
Hi, I’m Lee
Want some help getting a perfect lighthouse score? Let’s talk.